Developer Insights #23: Black Hole Sun
Hey! I’m Jon Cioletti, the Senior Technical Artist focused on lighting and VFX here at Intercept Games! In celebration of the upcoming total solar eclipse, today we are looking at some of the lighting tech around eclipses in KSP2 - but first we have to talk about eclipses in REAL life!
To help with that, we reached out to one of our friends over at NASA: Senior Visualization Designer AJ Christensen. AJ works at NASA's Scientific Visualization Studio (SVS), where he develops visualization techniques and designs data-driven imagery for scientific analysis and public outreach. AJ was kind enough to take some time out of his busy day to answer a few questions to kick this Dev Diary off right:
Can you very basically describe an eclipse and why it is a special event?
There are a lot of objects in space that pass between the Earth and the Sun at various times. We usually call it a “transit” when something that appears much smaller than the disk of the Sun passes in front of it, like an asteroid, or the International Space Station, or Venus.
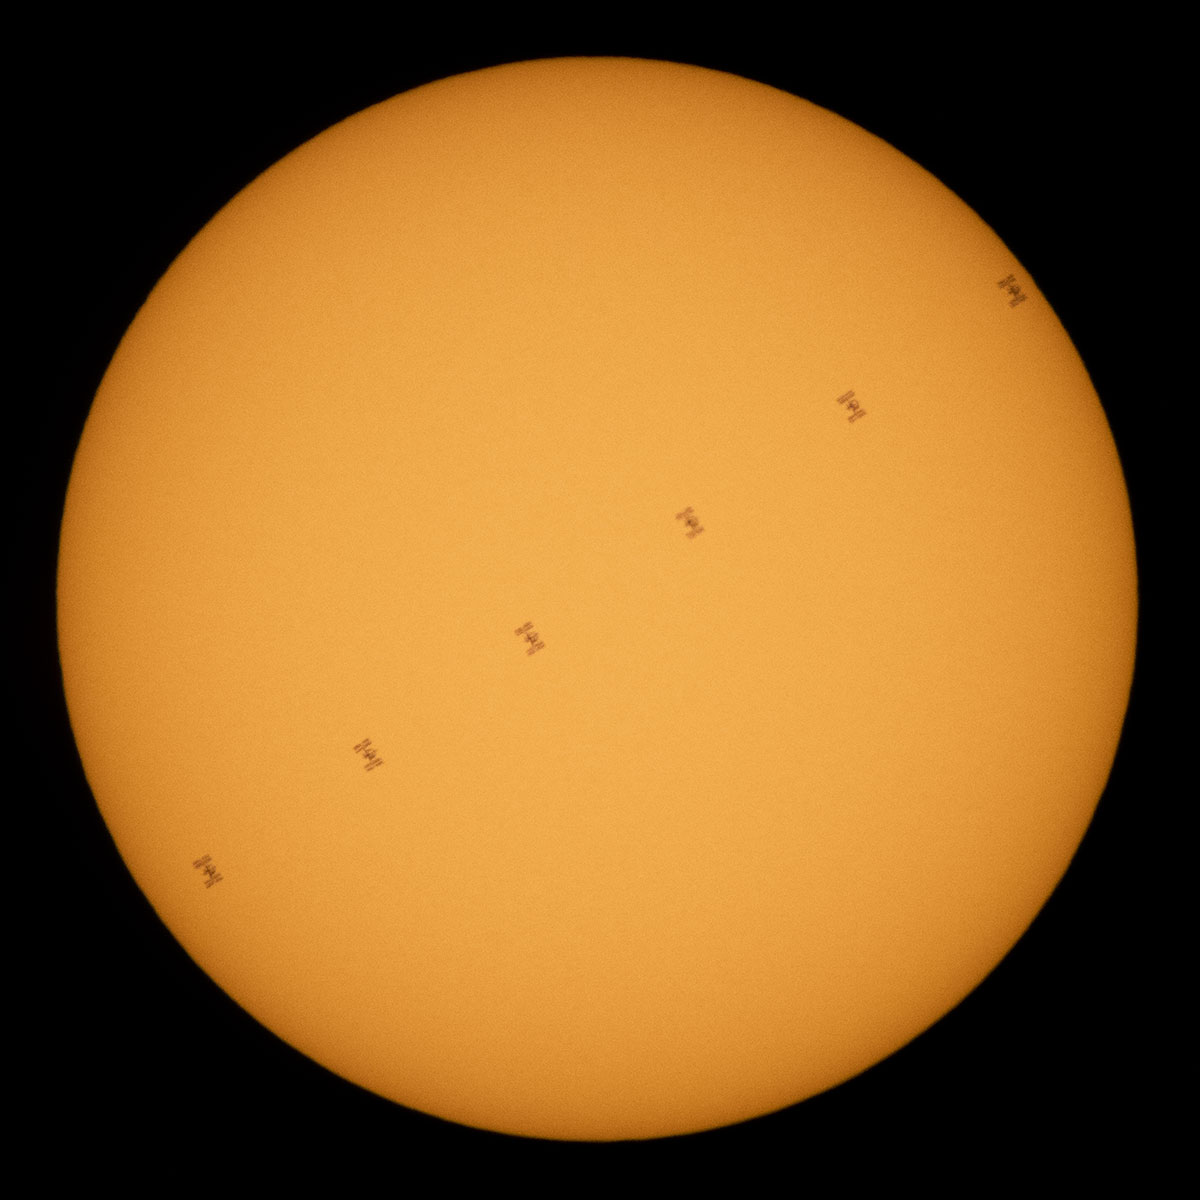
Credit: NASA/Joel Kowsky
But through a crazy coincidence of physical size and distance from Earth, the apparent size of the disk of the Moon in the sky is almost exactly the same as the apparent size of the disk of the Sun in the sky, and so when the Moon transits in front of the Sun, we call it an eclipse because it blocks out a significant part of the Sun’s light.
The Moon actually orbits around Earth approximately every 27 days, so you might think we would see an eclipse every 27 days, but because of the tilt of that orbit, the Moon is usually not lined up with the Earth and Sun. For this reason, a lot of orbits result in no eclipse, or only a partial eclipse.
The total eclipse happening on April 8th is a rare event where the Earth, the Moon, and the Sun are all in a straight line, and the United States will be on the “day side” of the planet, meaning we get to experience the Sun being completely blocked out by the Moon for a few minutes in any given location along the path of totality.
Credit: NASA Scientific Visualization Studio
What should people expect to see when viewing the eclipse?
Anyone within the contiguous United States will be able to see the eclipse in some way on April 8th. If you are outside the path of totality, you will have several hours to witness a partial eclipse in the middle of the day. This means that the Sun will have a bit of a crescent shape, but it will not completely block the Sun. This is a fun time to put on approved solar eclipse viewing protective glasses and look at the shape of the sun, and to make pinhole projectors out of colanders or crisscrossed fingers to see lots of little crescent shadows on the ground.
If you are inside the path of totality, which is about 100 miles wide and travels from Texas to Maine, you will see that partial eclipse for several hours, but right in the middle will be 3-4 minutes of totality when the bright disk of the Sun called the “photosphere” is completely blocked. During totality, the temperature will drop, crickets may start chirping, and you will see sunset colors in the sky in 360-degrees all around you.
Credit: NASA Scientific Visualization Studio
If you are able, it is definitely worth trying to get inside the path of totality. One place of many that you can find more information to plan a trip is this visualization my colleagues made:
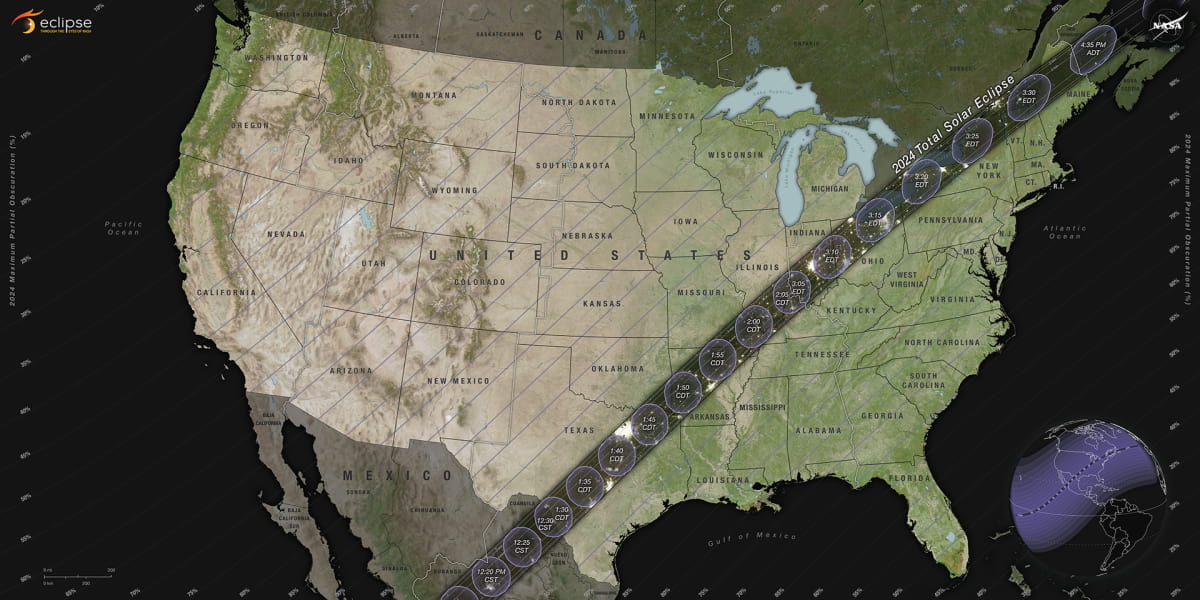
Credit: NASA Scientific Visualization Studio
What happens to the Sun’s light during an eclipse?
In the words of “Mr. Eclipse” Fred Espenak, a retired NASA astrophysicist, “there are no special eclipse rays.” The Sun continues to be what it always is – an extremely bright object in the sky that hurts to look at. This is why NASA insists that anyone viewing the eclipse should wear approved eclipse-viewing lenses, because even during a partial eclipse, you are still looking directly at the Sun. (Note, cameras can also be damaged if they look directly at the sun without a solar filter.)
However, in the last seconds before totality, there are some dazzling effects we can see. The first to occur is called the “Diamond Ring Effect”. This is where some of the sun’s light wraps around the horizon of the moon like a ring, and a sliver of light still at the edge creates a huge amount of glare like a diamond.
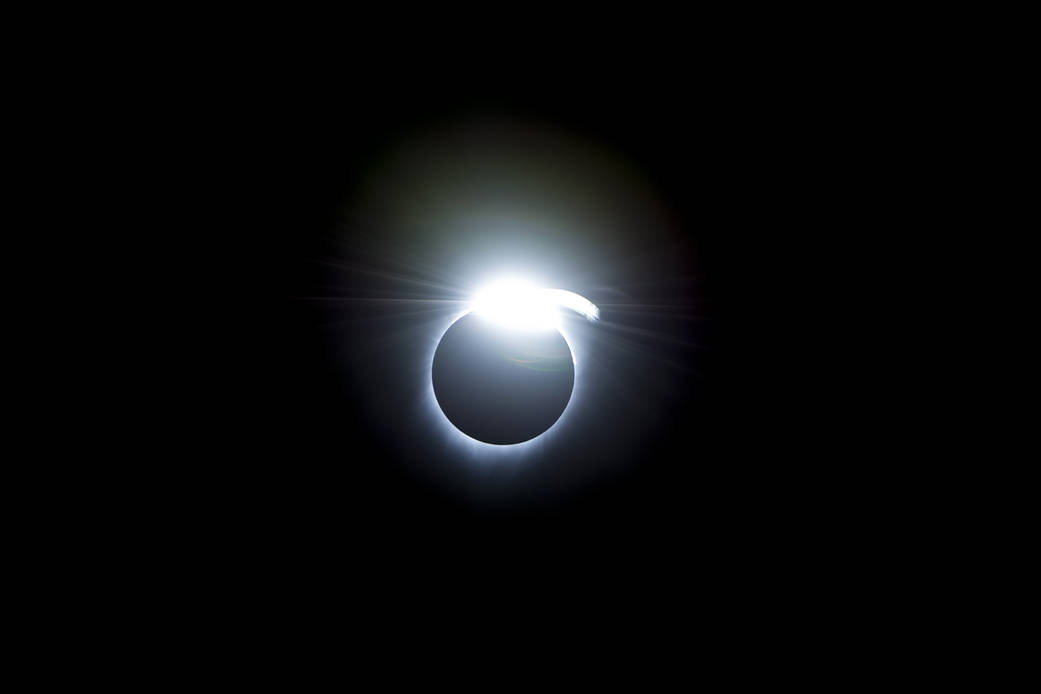
Credit: NASA/Carla Thomas
The next effect we call “Baily’s Beads” which are visible for only a moment – these are a line of bright spots of light that poke through the valleys on the edge of the Moon.
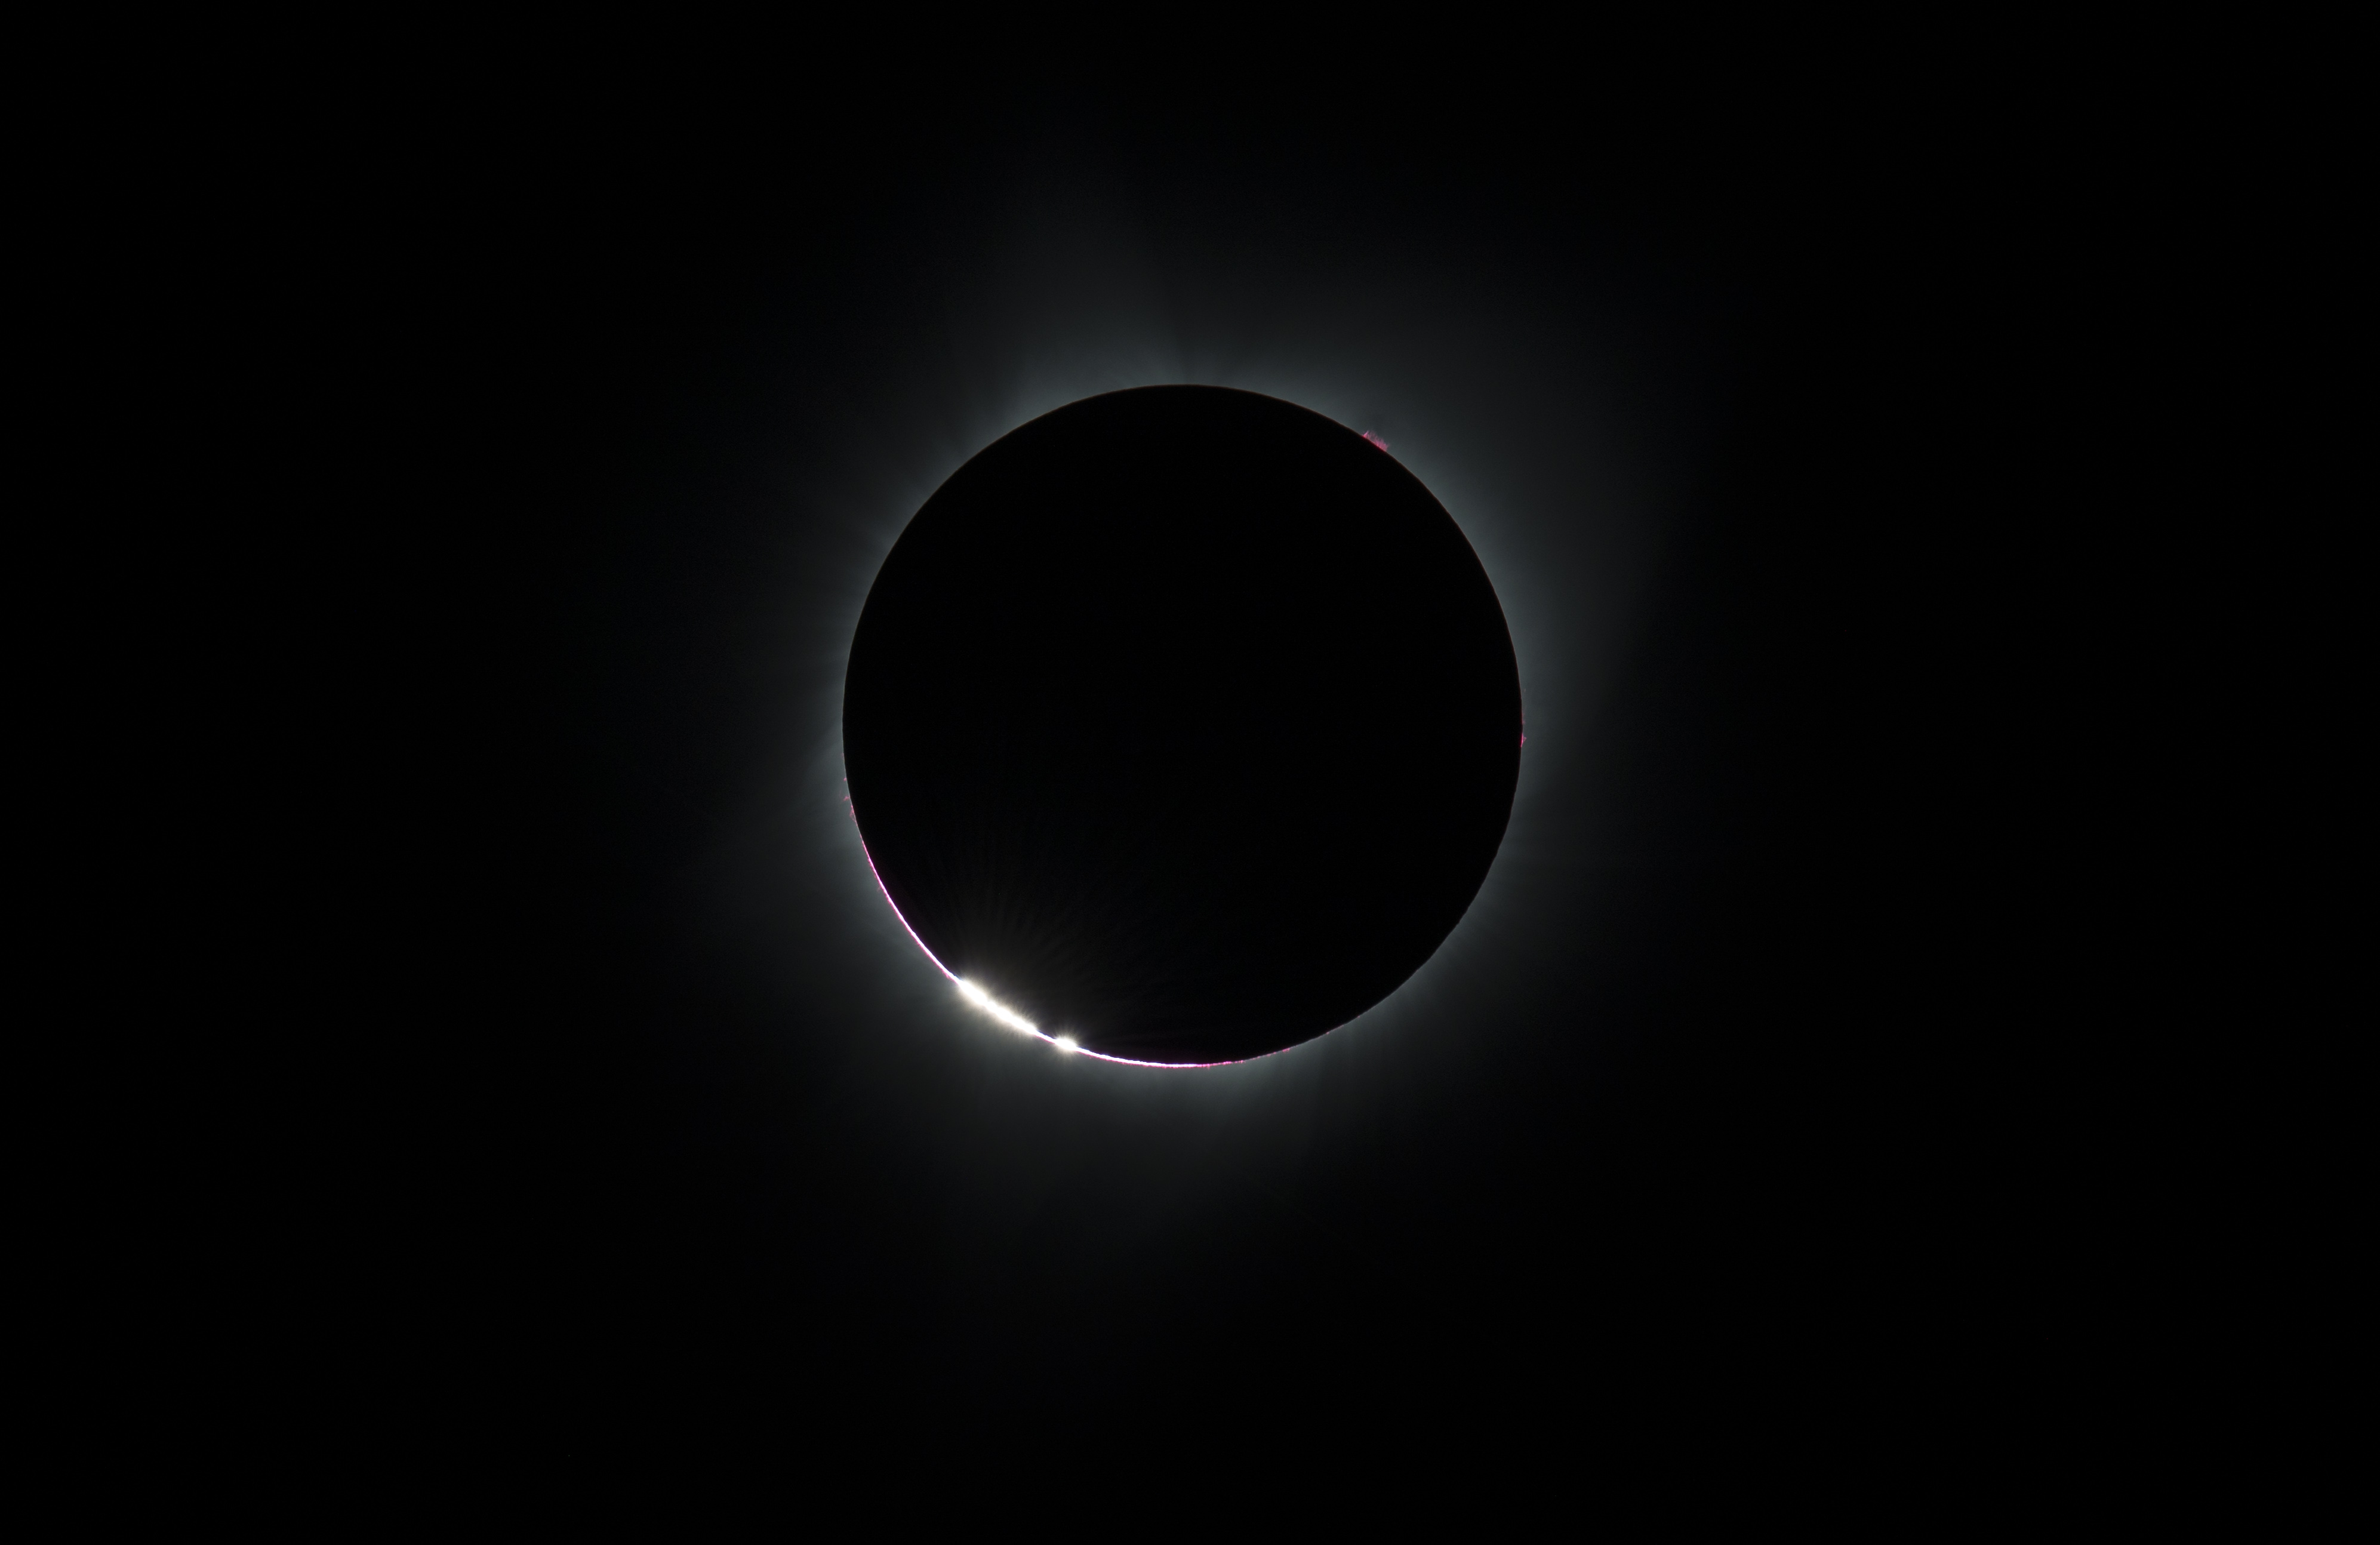
Credit: NASA/Aubrey Gemignani
And finally, once the Sun is completely covered by the moon, we get to see magic of the Solar corona, long tendrils of illuminated plasma in the Sun’s atmosphere. The corona is always there in the sky, but it is usually completely covered up by glare from the disk of the Sun, which is about 1 million times brighter than the corona. For these 3 or 4 minutes of totality, we recommend taking off your eclipse glasses and soaking in the corona with your bare eyes.
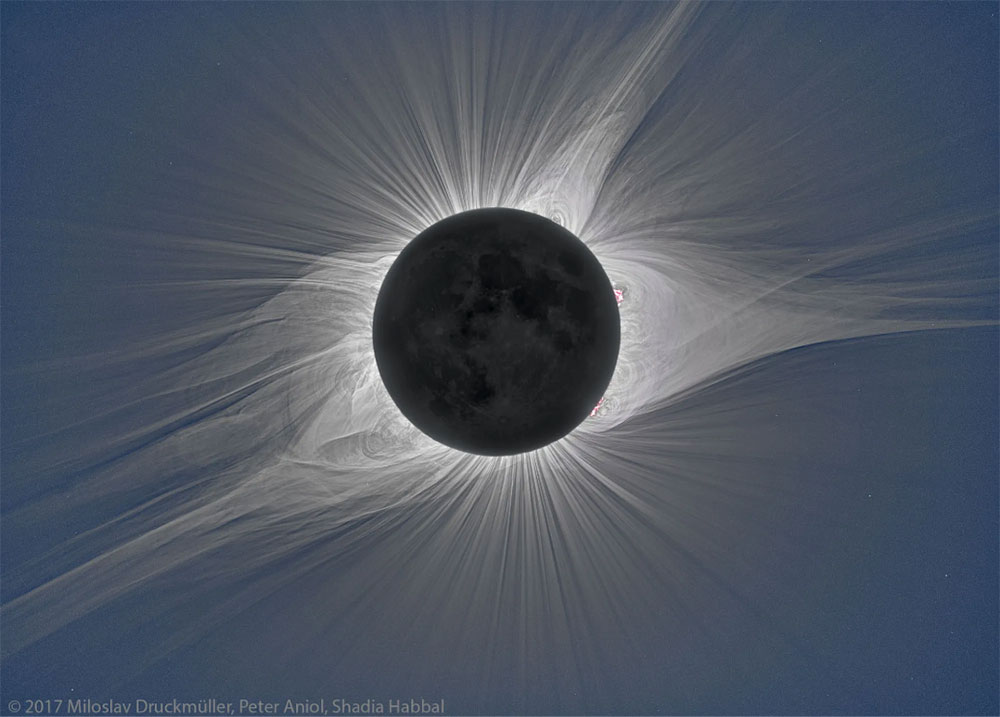
Credit: Miloslav Druckmüller, Peter Aniol, Shadia Habbal/NASA Goddard, Joy Ng
Once totality ends, Baily’s Beads and the Diamond Ring will appear again and we recommend putting your eclipse glasses back on to enjoy the rest of the partial eclipse.
How does that inform your work with the Visualizations team at NASA?
My team is called the Scientific Visualization Studio, and we use both observed and computed data to make images and videos that explain science research. We have been working closely with scientists and communicators across NASA to create computer graphics imagery to help explain what the April 8th eclipse will look like on the Earth’s surface and in the sky, the surprising geometry of the Earth-Moon-Sun system, and more.
We even recently published a game aimed toward younger audiences on NASA’s SpacePlace website called “Snap It!” that gets into what transits are and how eclipses are a special kind of transit. You can find it at this link: https://go.nasa.gov/SnapIt.
And, of course, you can view thousands of visualizations about the eclipse and other science topics at our website: svs.gsfc.nasa.gov.
----
So now that we have a good idea of what happens during eclipses in real life, let's jump into the game!
Directional Lighting
To try and simulate the lighting we see in our solar system we use a variety of systems, but for the eclipse we’ll be focusing on our direct lighting solution with the star of the solar system: Kerbol. While a star technically emits light in all directions, in our game we only really need to care about the star’s light that reaches our player. To handle this, we use a Directional Light which, by definition, is located infinitely far away and emits in one direction only.
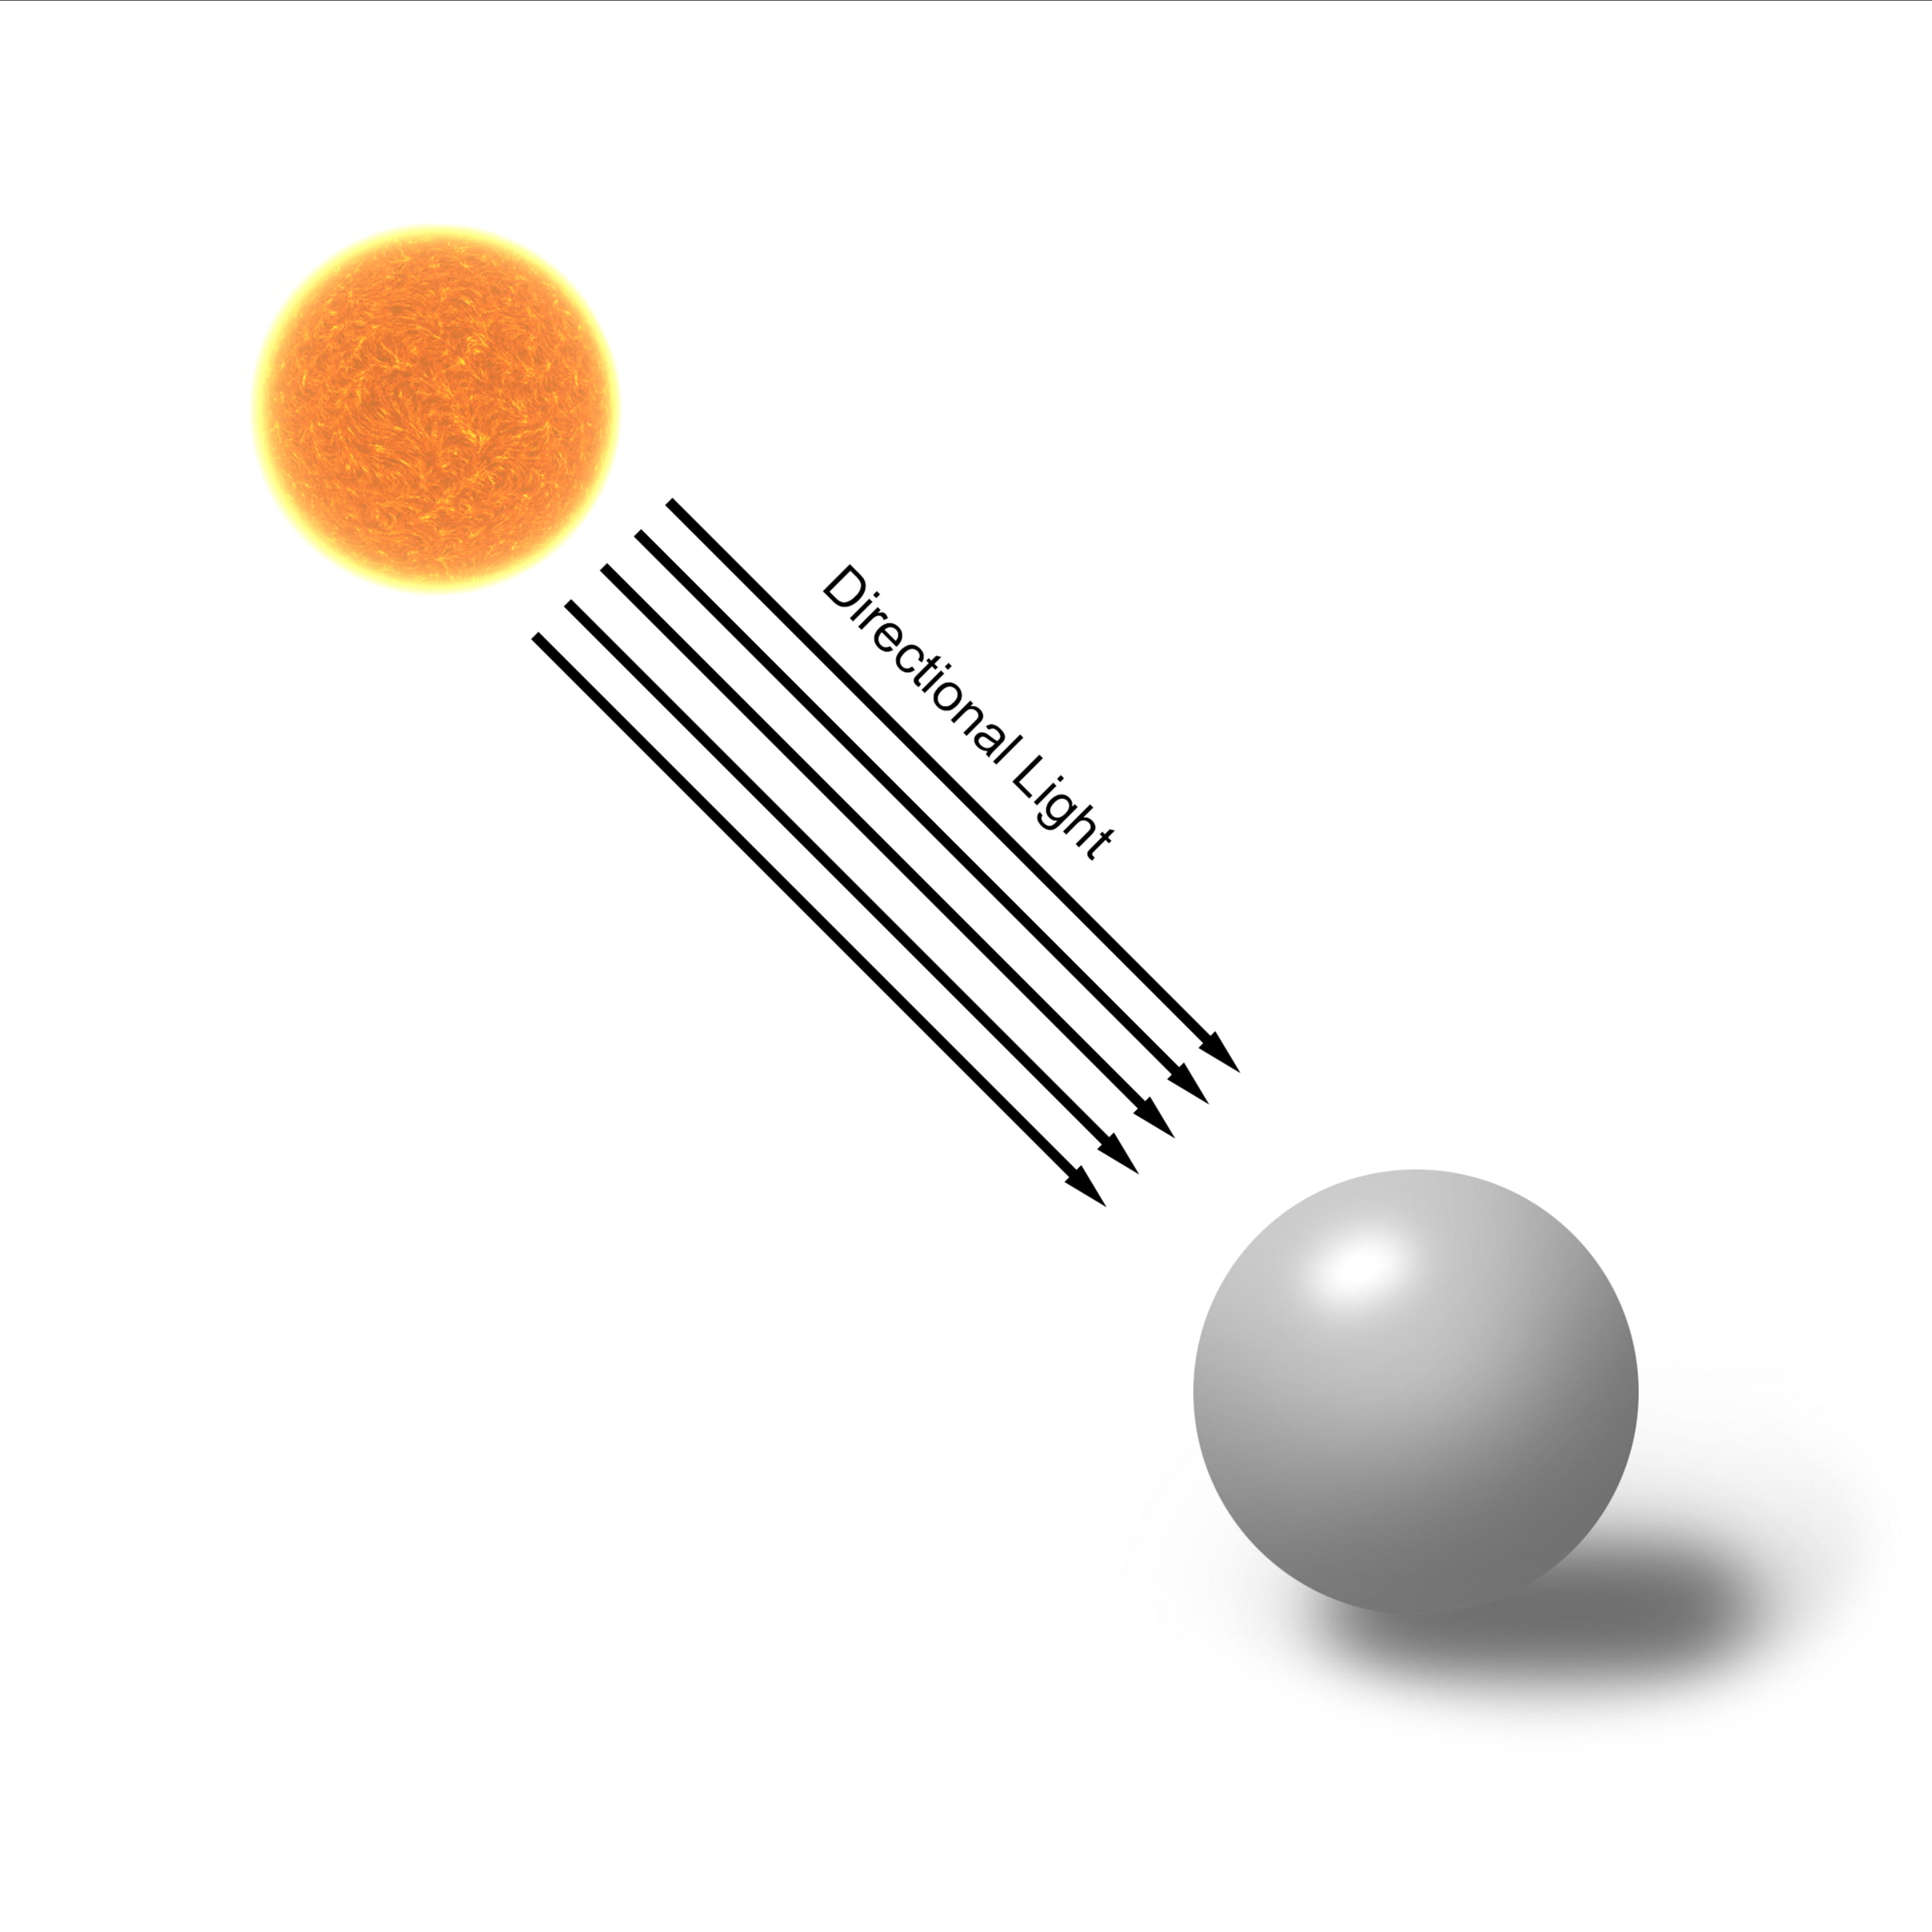
This works great for lighting our worlds with an intense light from a single distant source like a star. This directional light is also responsible for the direction that all shadows are cast in game.
To make this directional light behave more like an actual star, we attenuate its intensity based on distance and occlusion. Distance is the easier of the two. If the player flies their Kerbals way out towards Eeloo they’ll noticed their vessel gets much dimmer. Looking back at Kerbol they can see it shrinking in the skybox as well. To manage this, in the lighting code we attenuate the light’s intensity based on the Inverse Square Law which states that “the intensity of the radiation is inversely proportional to the square of the distance”. The formula looks a little something like this: 1 /x ² . Things like artist adjustable overrides and camera auto-exposure play into the lighting too, but in general throughout the solar system, the further you get from the star, the dimmer it gets.
For smaller objects like terrain, buildings, and parts, we use shadows to show light being occluded. But for something as huge as a celestial body we track how much they block our Kerbals from the star itself to attenuate the light intensity appropriately. As an example, we’ll use a solar eclipse with Kerbol and the Mun.
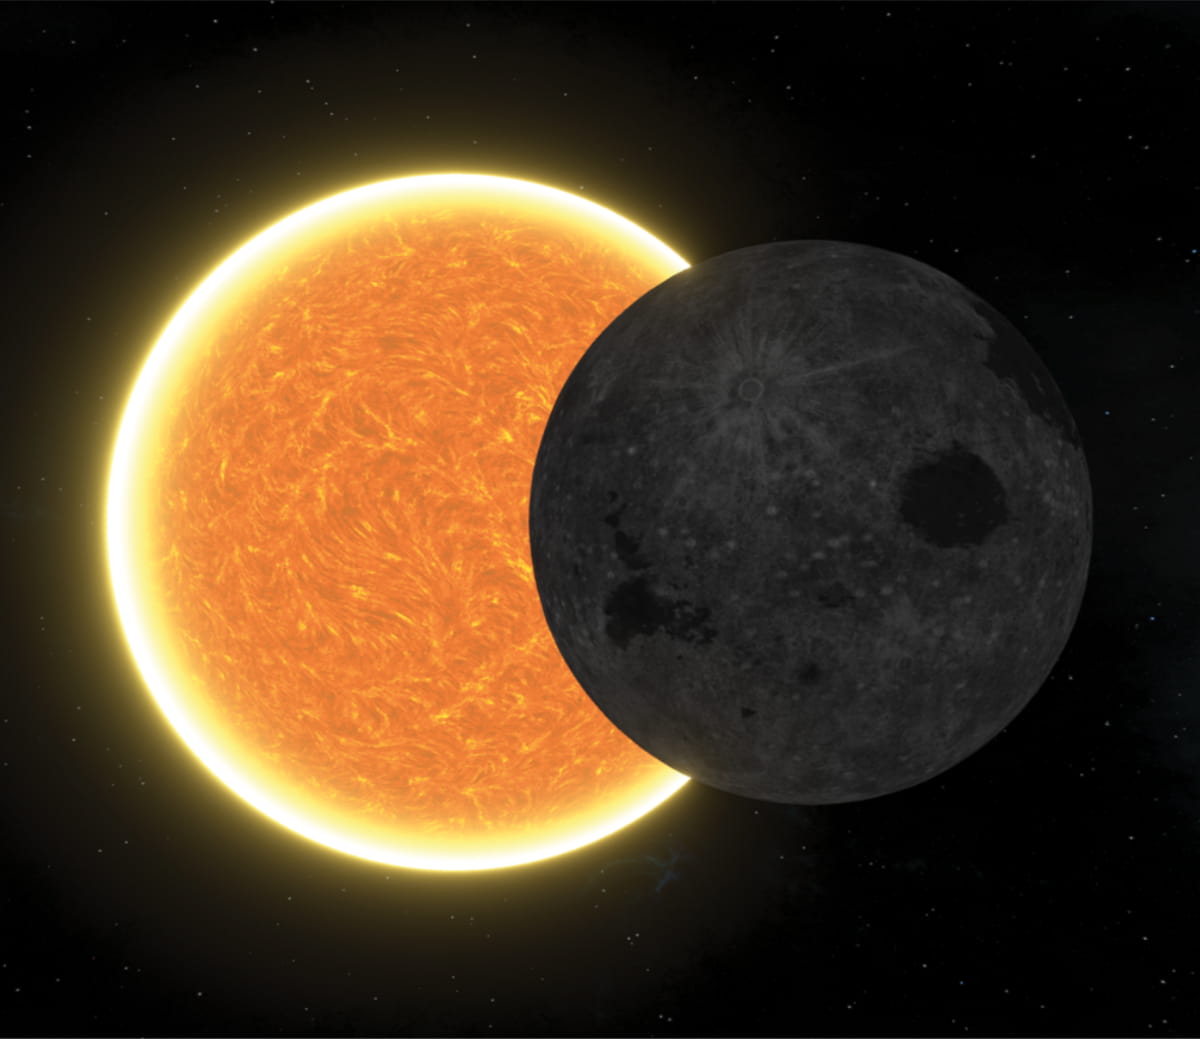
Intersection of Circles
When you think about it in a flat 2D space, this is just two circles intersecting each other. If that’s the case then we can solve for the area of overlap to determine how occluded Kerbol is. The diagrams and formulas below show more of the math being done behind the scenes:
Our lighting system holds a reference to the current SOI celestial body, that body’s star and any neighboring bodies. All of these bodies are projected into a normalized sphere around the player where the system checks if any bodies are going to intersect. We can quickly verify this by checking if the sum of the body’s radii are greater than or equal to the distance between them. Once we pass this check, the intersection code starts and we begin solving for the amount of overlap to determine the percentage a body is blocked.
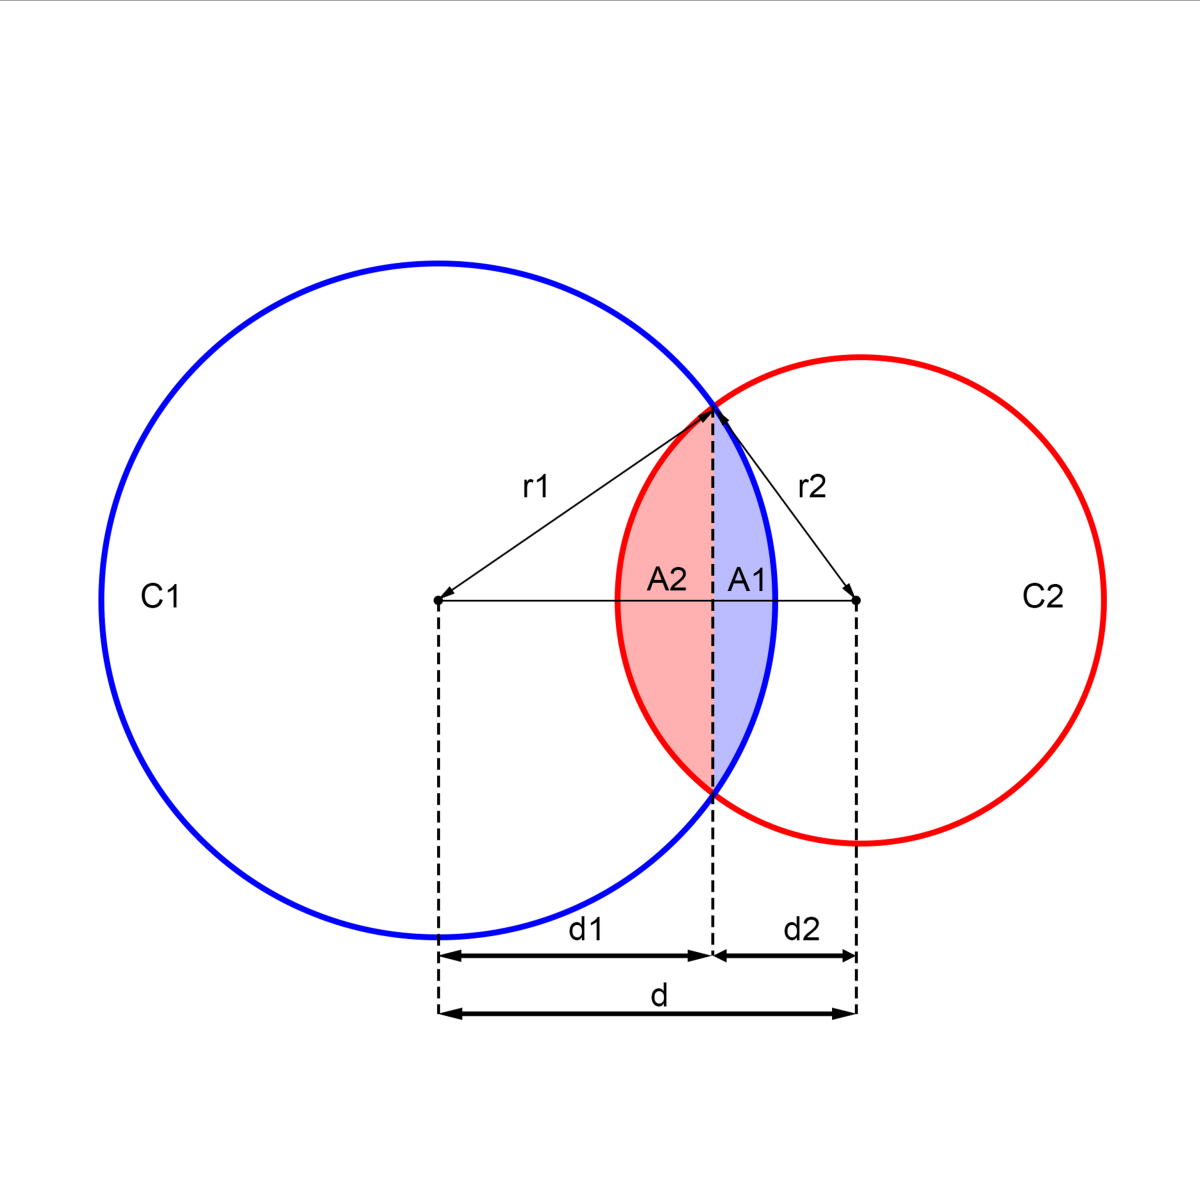
First step is to solve for the distance each circle is from the center of the intersection. To do this we use the equation of a circle and populate it with the values we know.
C₁: x ² + y ² = r ₁²
C₂: ( x - d )² + y ² = r ₂²
Then, isolate y ² in each equation and combine both equations like so:
y ²= r ₁² - d ₁²
y ²= r ₂² - ( d₁ - d )²
r ₁² - d ₁² = r ₂² - ( d ₁ - d )²
Finally, we can solve for d ₁ and d ₂ :
d ₁ = ( r ₁² - r ₂² + d ²) / 2d
d ₂ = d - d ₁
After that we can begin solving for the angle of the sector formed when tracing the radii of our celestial body to the intersection points:
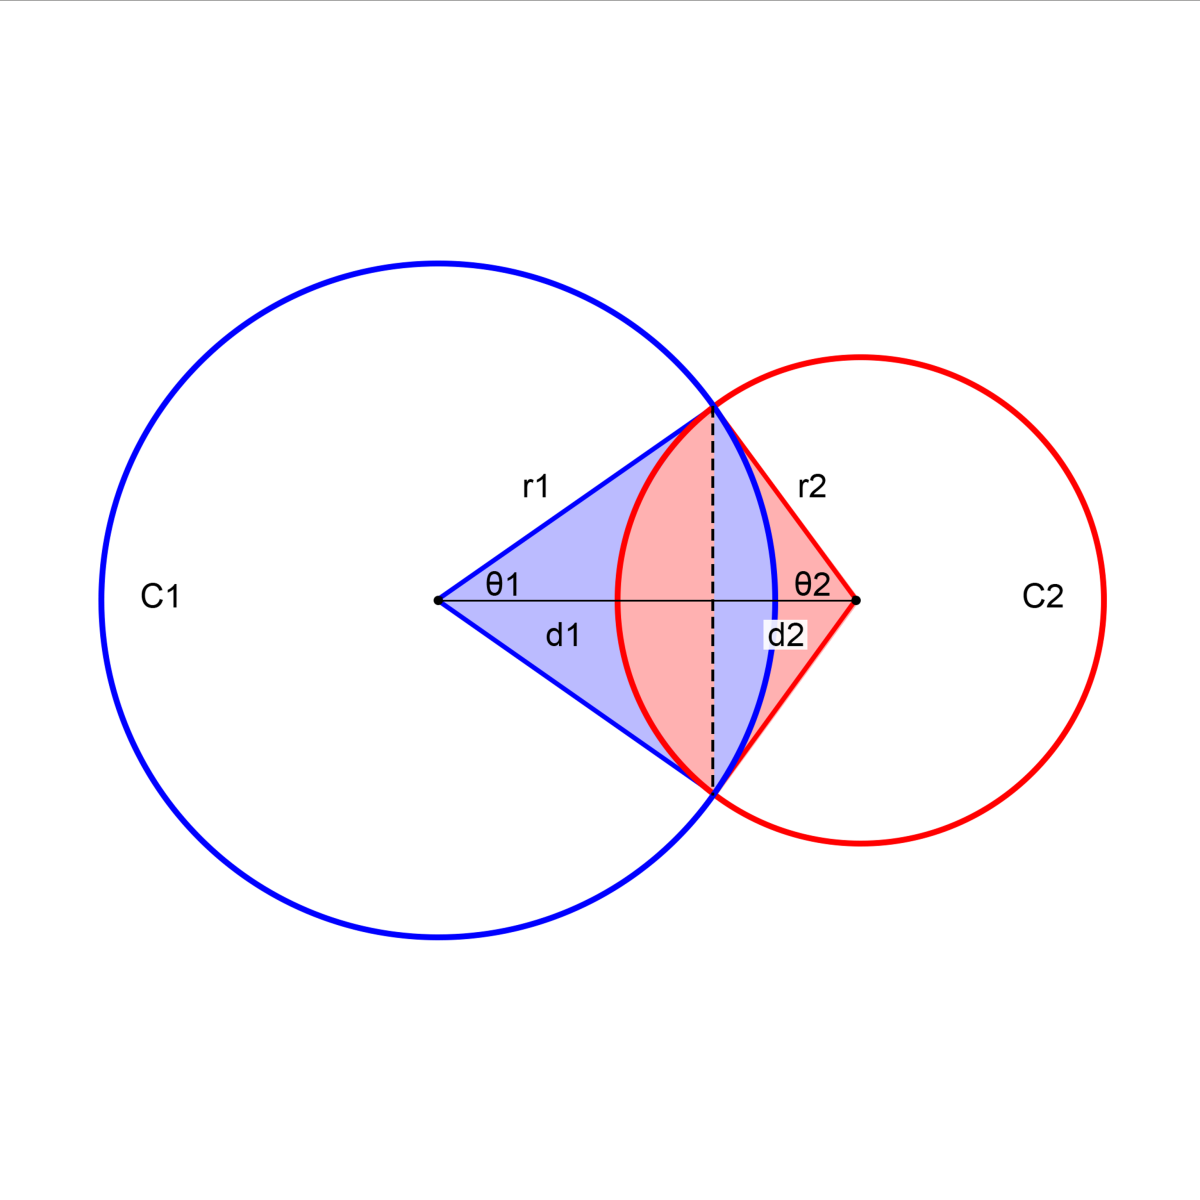
With our new θ₁ and θ₂ in radians, we can solve for the area of each body’s overlapping segment A₁ and A₂. The following formula is derived by subtracting the area of the triangle from the area of the sector formed by this angle:
Area of a triangle = ( 1 / 2 ) r² sinθ Area of a sector = ( 1 / 2 ) r² θ
Area of segment = ( ( 1 / 2 ) r² θ ) - ( ( 1 / 2 ) r² sinθ ) = ( r² / 2 ) * ( θ - sinθ )
A1 = ( ( r₁² ) / 2 ) * ( θ₁ - sinθ₁ ) A2 = ( ( r₂² ) / 2 ) * ( θ₂ - sinθ₂ )
Total Area = A1 + A2
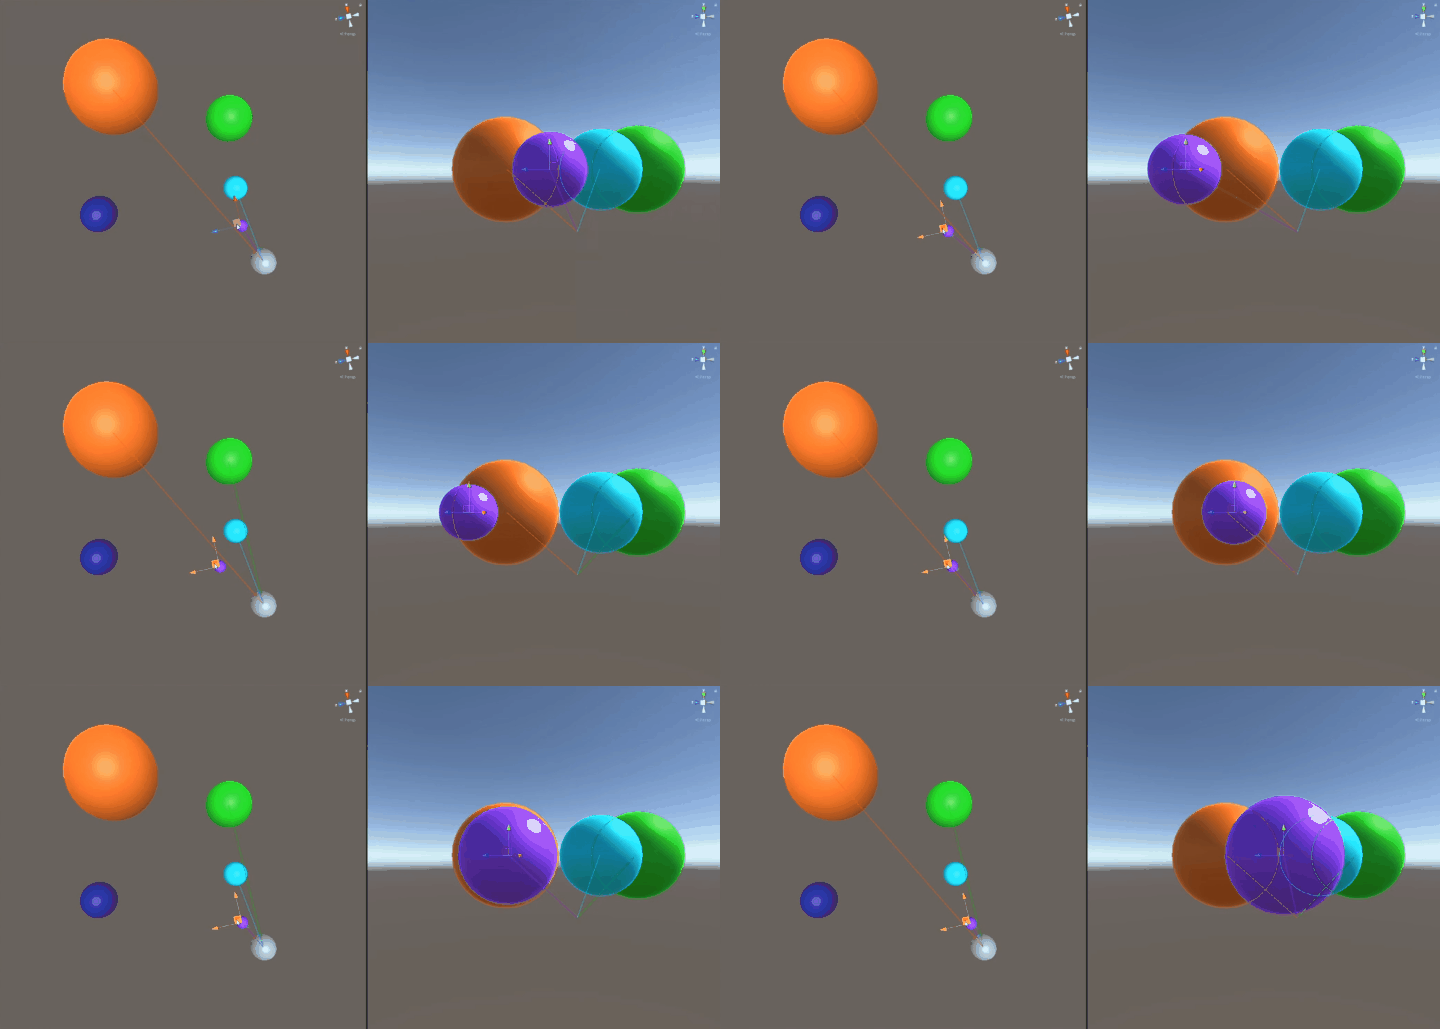
And there you have it, the area of overlap for the celestial body. This can then be used to determine the percentage of visibility the further body has by subtracting the occluded area from the total projected circle area and with that number we can scale the intensity of the light emitted by that source body. In our case for the eclipse that will dim the Kerbol’s intensity as the Mun passes over
Simulated eclipse over the KSC
Lens Flare Occlusion
The final piece of the puzzle here is the lens flare of the star changing to show that it has been occluded by the Mun. The same visible percentage value is passed through to the lens flare system where it attenuates the scale of the flare to match the reduction of directional lighting in the environment. Unfortunately, this doesn’t capture the details of a total solar eclipse though.
Simulated eclipse over the KSC from the ground
We have plans to improve the look of eclipses and celestial body occlusion beyond attenuation and add more noticeable “flair” to a total eclipse like Kerbol’s corona peeking out from behind the Mun!
We’ll be keeping a close eye on the next total solar eclipse as reference and inspiration! And, if you're nearby and able to, we hope that you join us on April 8th in safely viewing this awesome event right above our heads.
Thanks to AJ and everyone over at NASA for contributing to this Dev Diary - and thanks to you for reading!
Cioletti
